Step by Step from Zero to Streaming Zixi with Red5 Cloud
To get started with Red5 Cloud, you will need to create an account and set up a stream. This guide will walk you through the process of creating an account, configuring an RTMP stream from OBS Studio to Zixi Broadcaster locally, configuring a stream for Zixi pull in Red5 Cloud, and finally putting a player into a webpage.
Prerequisites:
- Red5 Cloud account: Sign up here. Instructions for creating an account can be found here.
- Zixi Broadcaster: Note that Zixi Broadcaster is not available for general download. You can register for an evaluation here.
- OBS Studio: Download here.
- OBS Studio configured for video streaming from either a local file or a local camera: Quick Start.
Configure Zixi Broadcaster
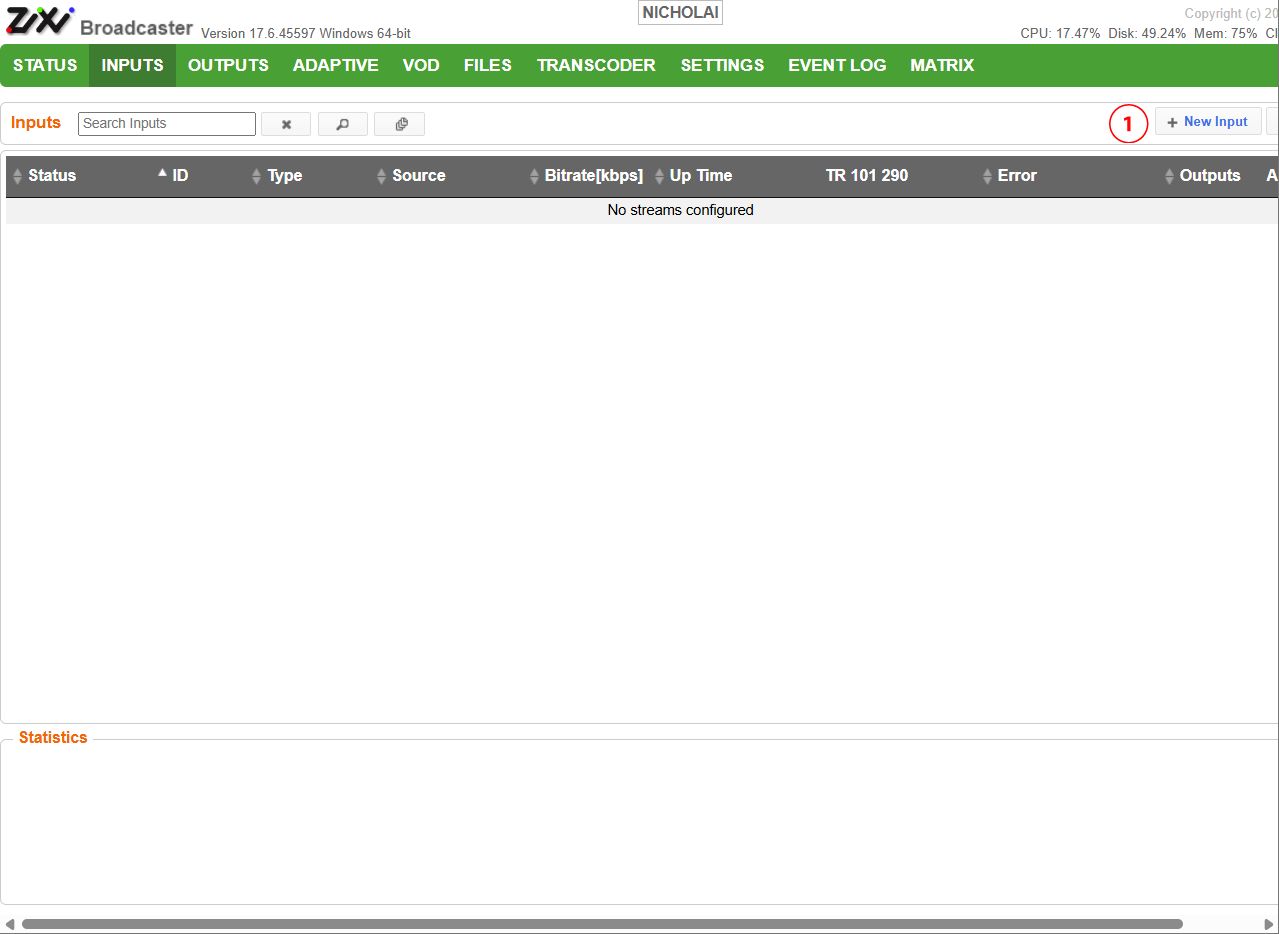
From the Zixi Broadcaster INPUTS page, select “+ New Input” (1)
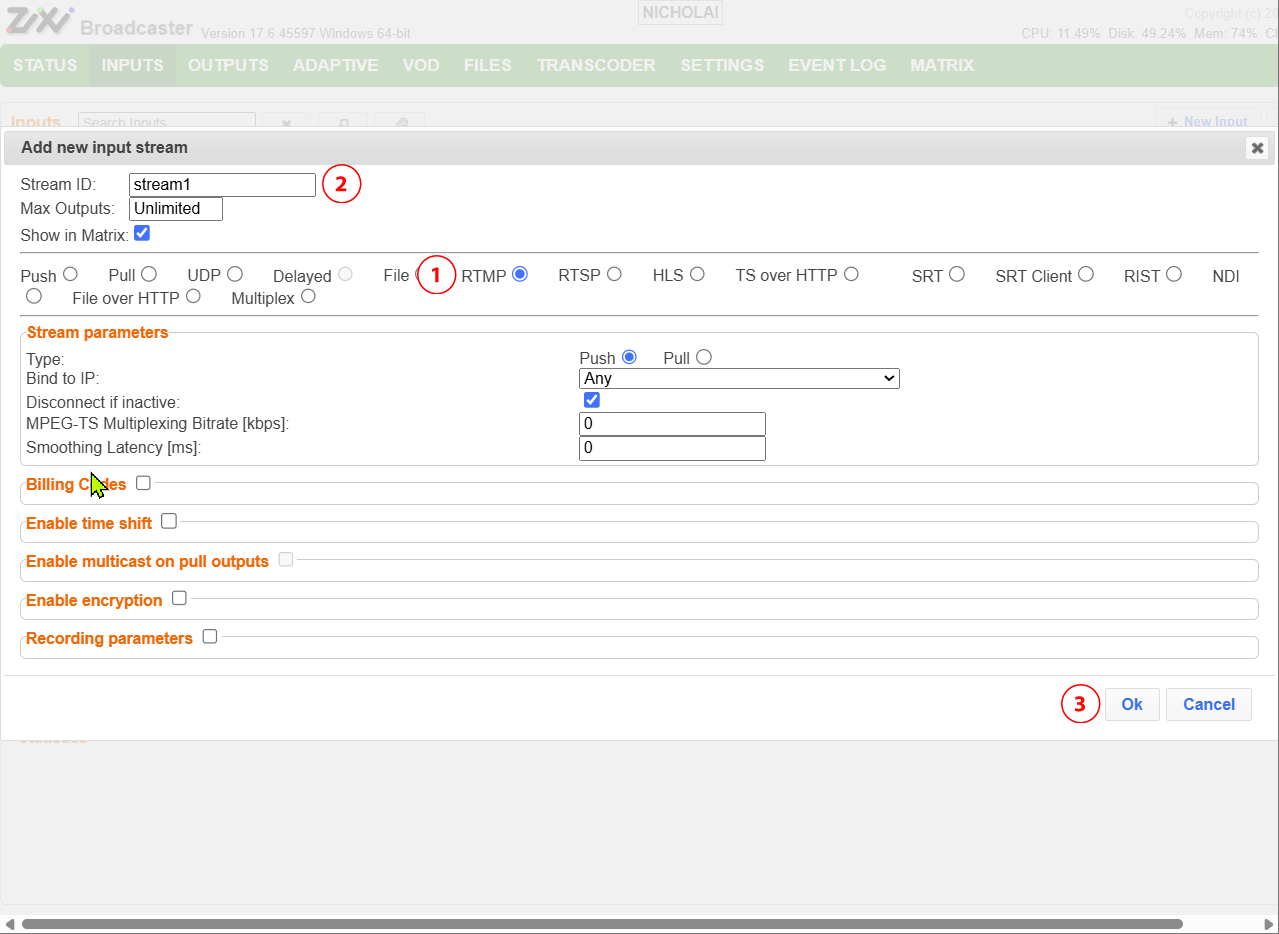
Click “RTMP” (1), enter a Stream ID (in this case “stream1”) (2) and click OK (3).
Configure OBS Studio
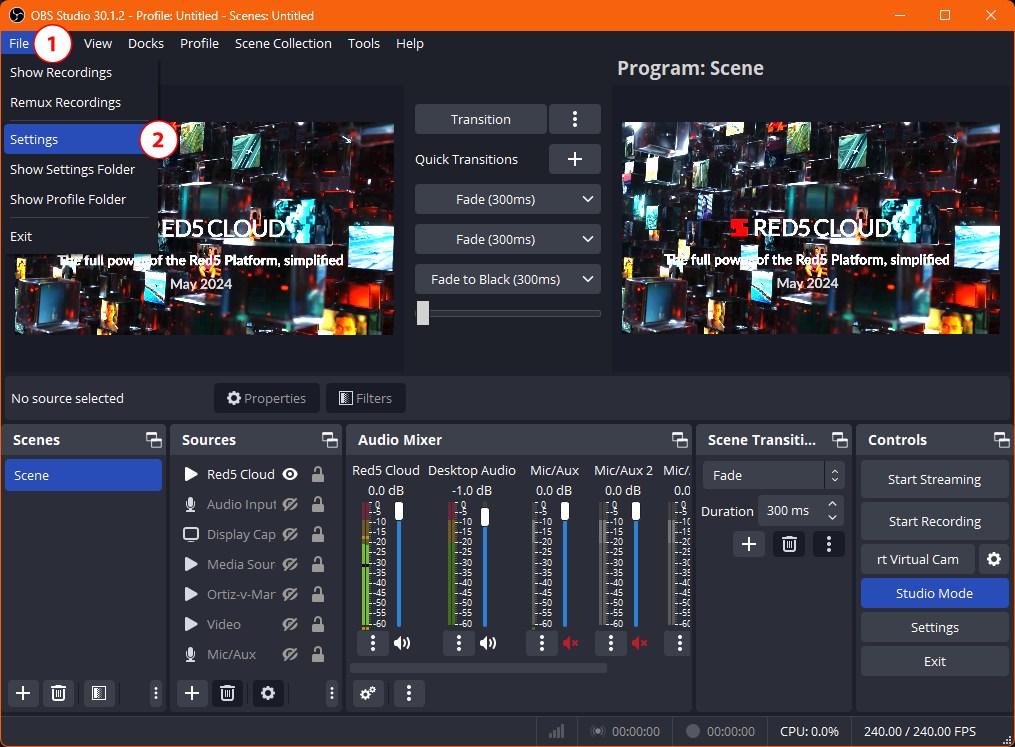
Open OBS Studio and navigate to File (1) then Settings (2).
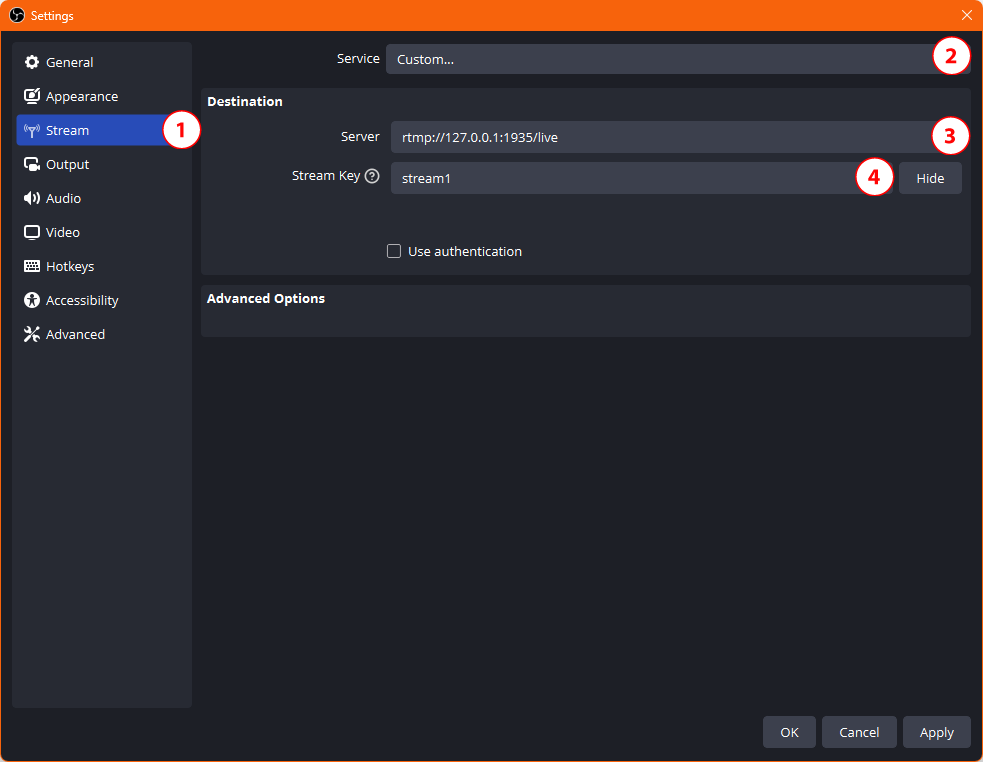
Select the Stream tab (1) and then select “Custom…” from the Service dropdown (2). Enter “rtmp://127.0.0.1:1935/live” into the Server field (3). Enter “stream1” (the stream created in Zixi Broadcaster) in the Stream Key field (4).
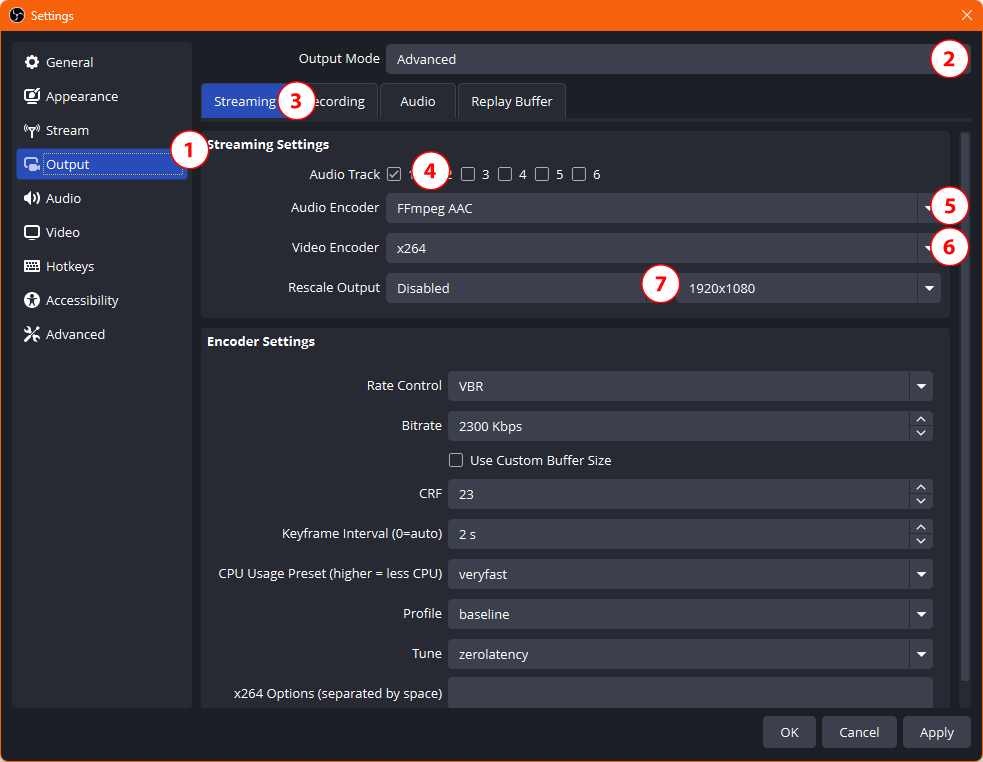
Select the Output tab (1) and then select the “Advanced” Output Mode from the dropdown (2). Select the “Streaming” tab (3) and then the first Audio Track (4). Ensure the Audio Encoder setting is set to “FFmpeg AAC” (5) and the Video Encoder is set to x264 (6). “Rescale Output” should be Disabled (7).
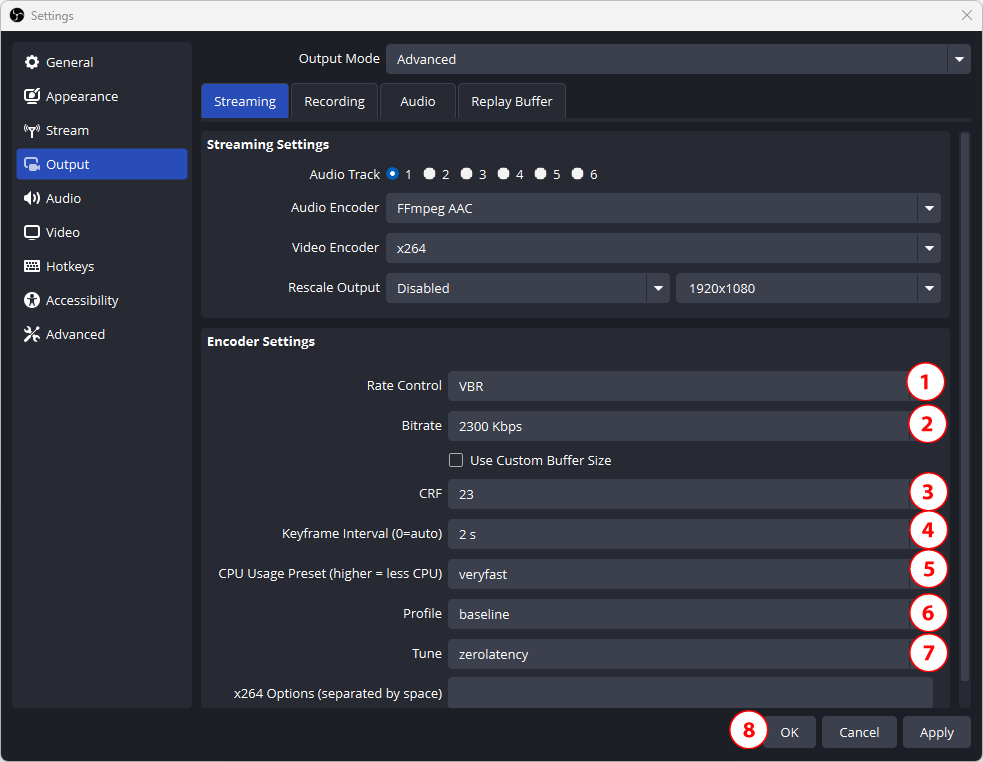
Set the “Rate Control” to VBR (1) and the bitrate to something appropriate for the video you are streaming (2) (bitrate information). Use a CRF value of 23 (3). Select a 2s Keyframe (4), use “veryfast” for the CPU Usage Preset (5), and set the Profile to “baseline” (6). The “Tune” setting should be set to “zerolatency” (7) to ensure that an additional buffer is not added to your stream. Save your changes by clicking “OK” (8).
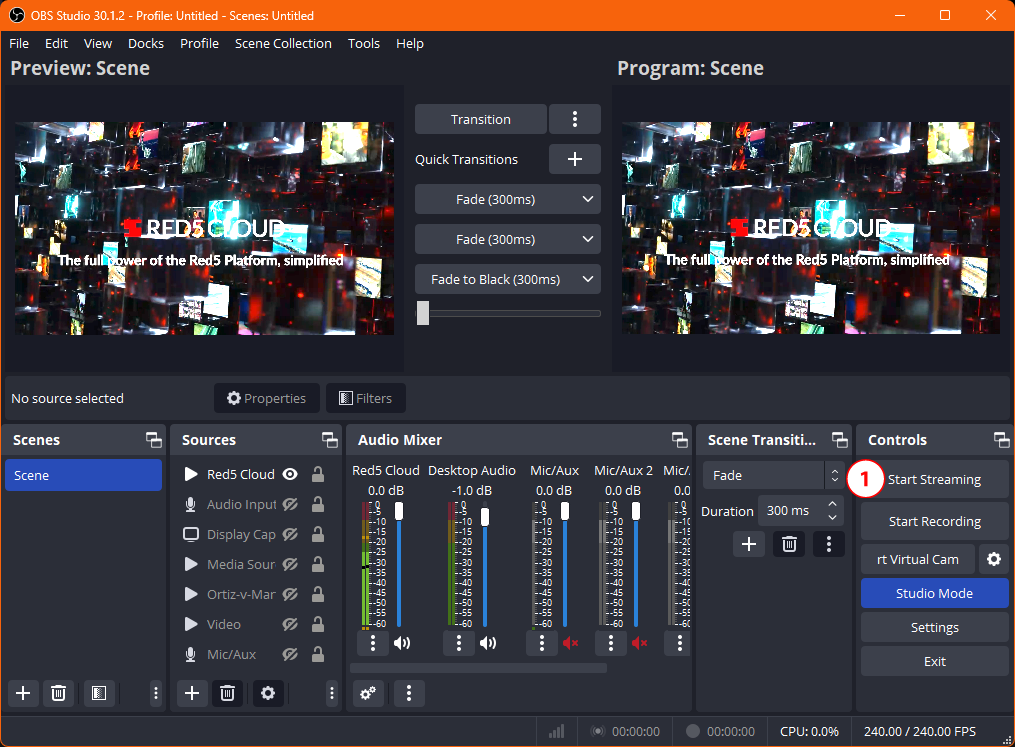
Start your stream by clicking the “Start Streaming” button (1).
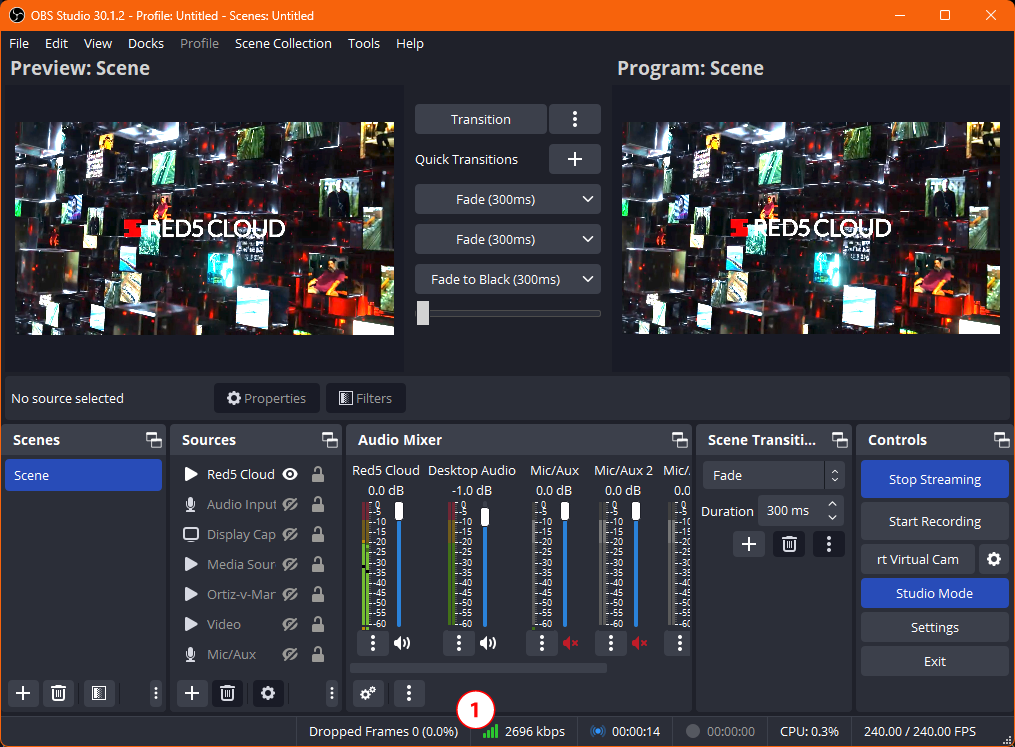
You should see the stream status in the bottom right corner of OBS Studio (1). If you see “green” you are connected and have a quality stream.
You should also see “green” and “Connected” in Zixi Broadcaster.
Configure Red5 Cloud
You will need the external IP address of your Zixi Broadcaster for this step. It must be reachable from the internet. Note: this will most likely mean that you will need to enable port forwarding on your firewall so that your Zixi Broascaster can be reached.
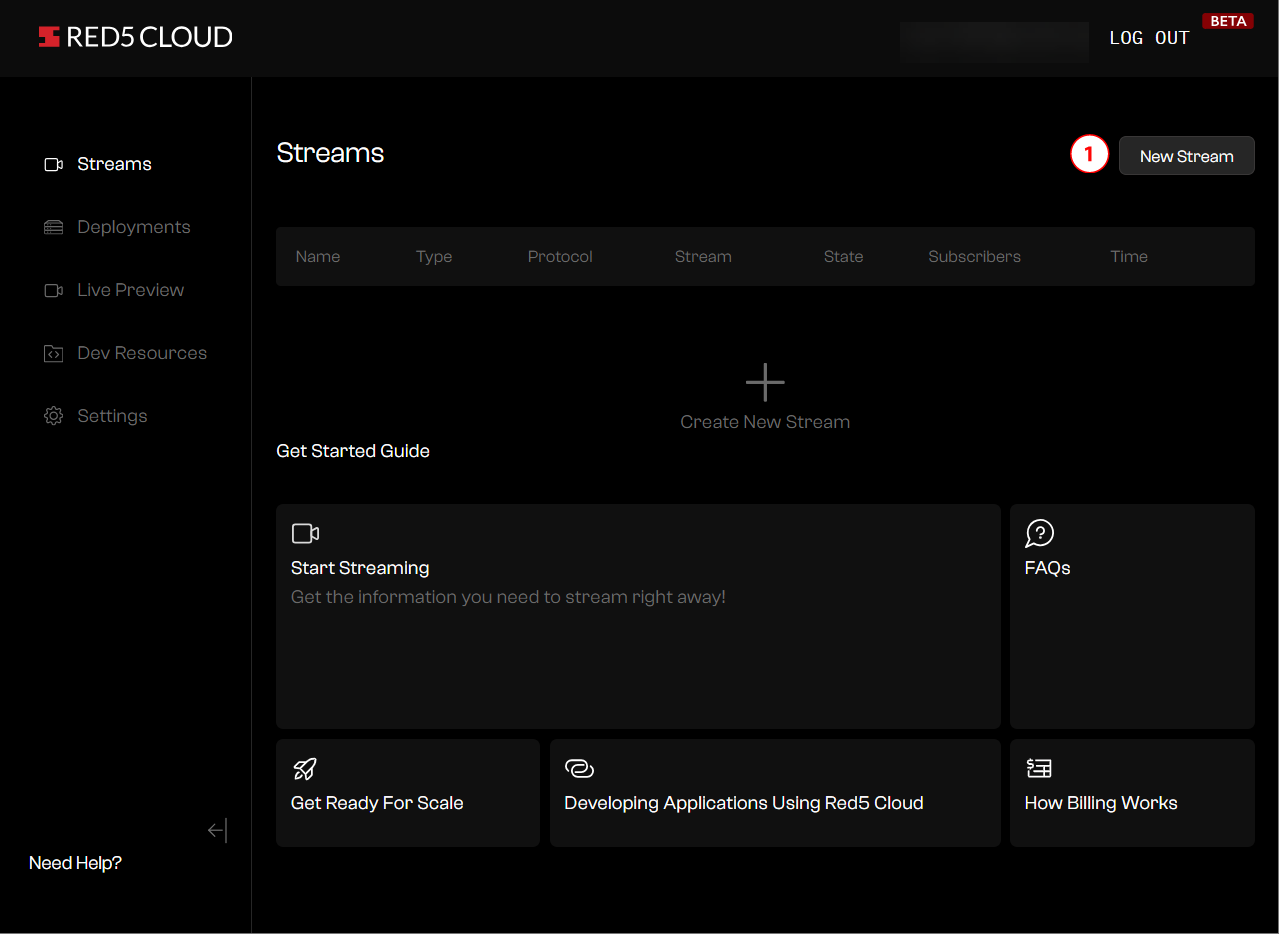
From the Streams page in Red5 Cloud, click “New Stream” (1).
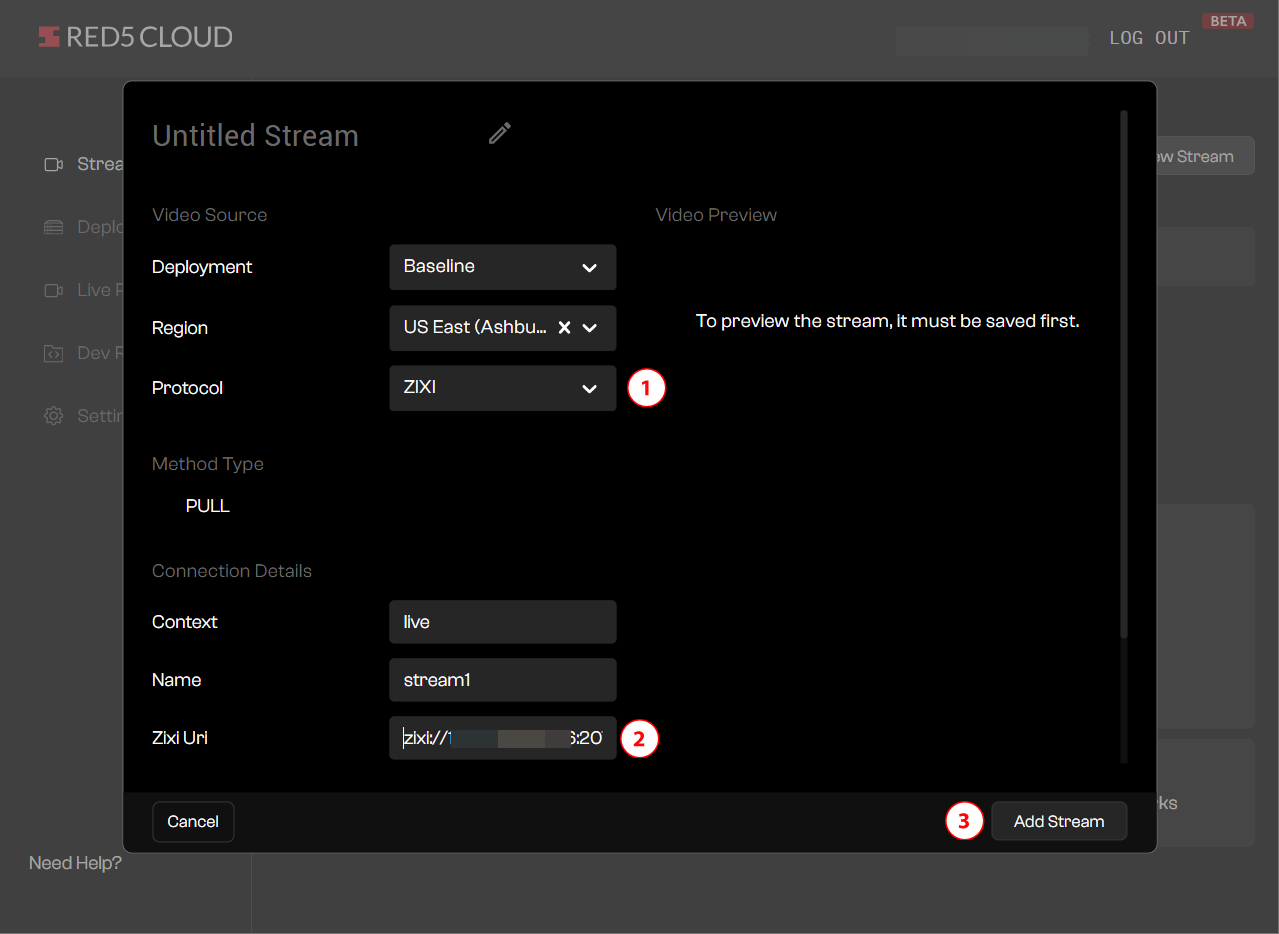
Select “ZIXI” from the protocol dropdown (1). In the Zixi Uri field, enter “zixi://ZixiBroadcasterIpAddress:2077/stream1” (2), and click Add Stream (3).
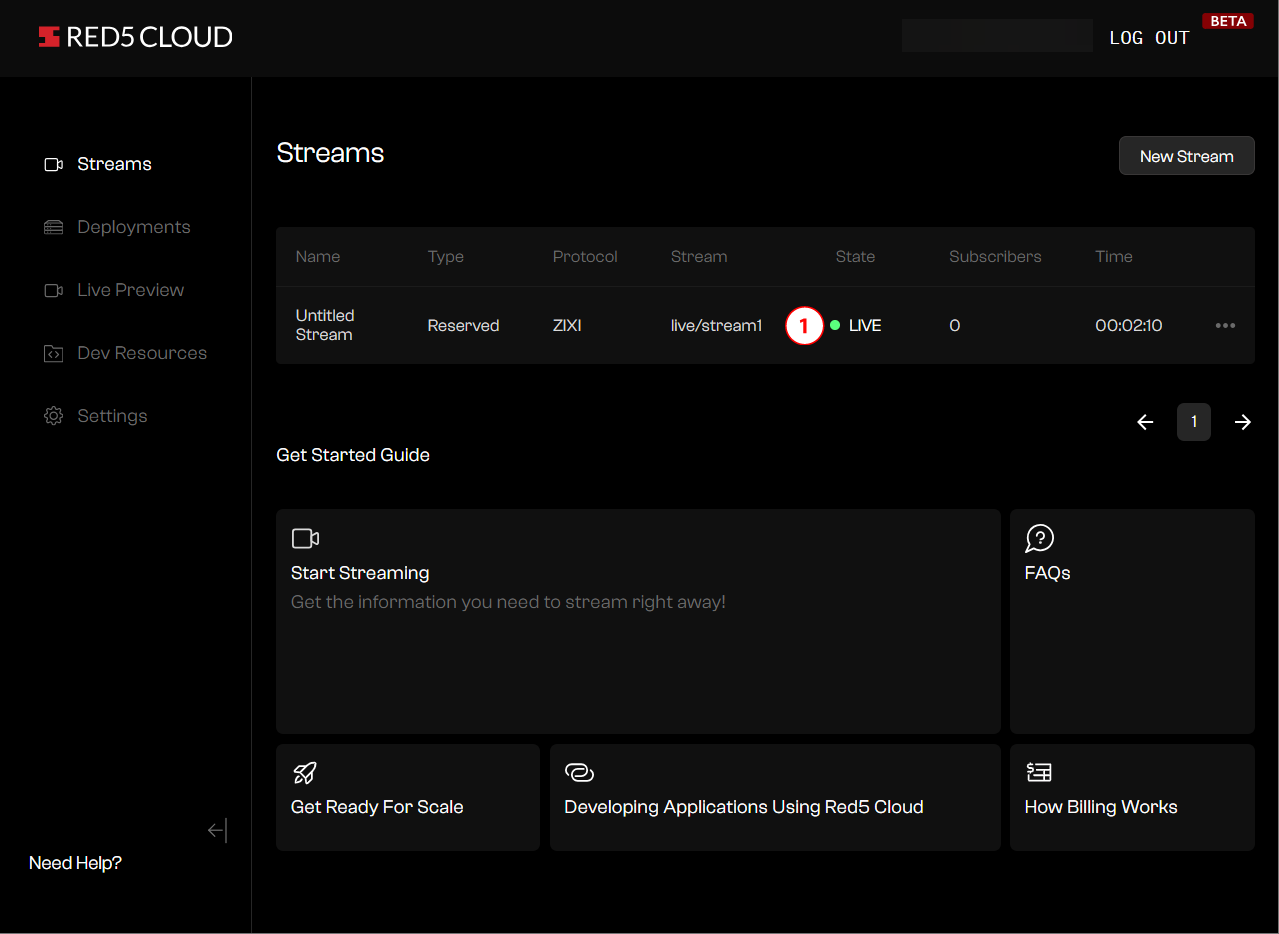
When you return to the Streams page, you can see your active stream with a “green” indicator and “LIVE” (1).
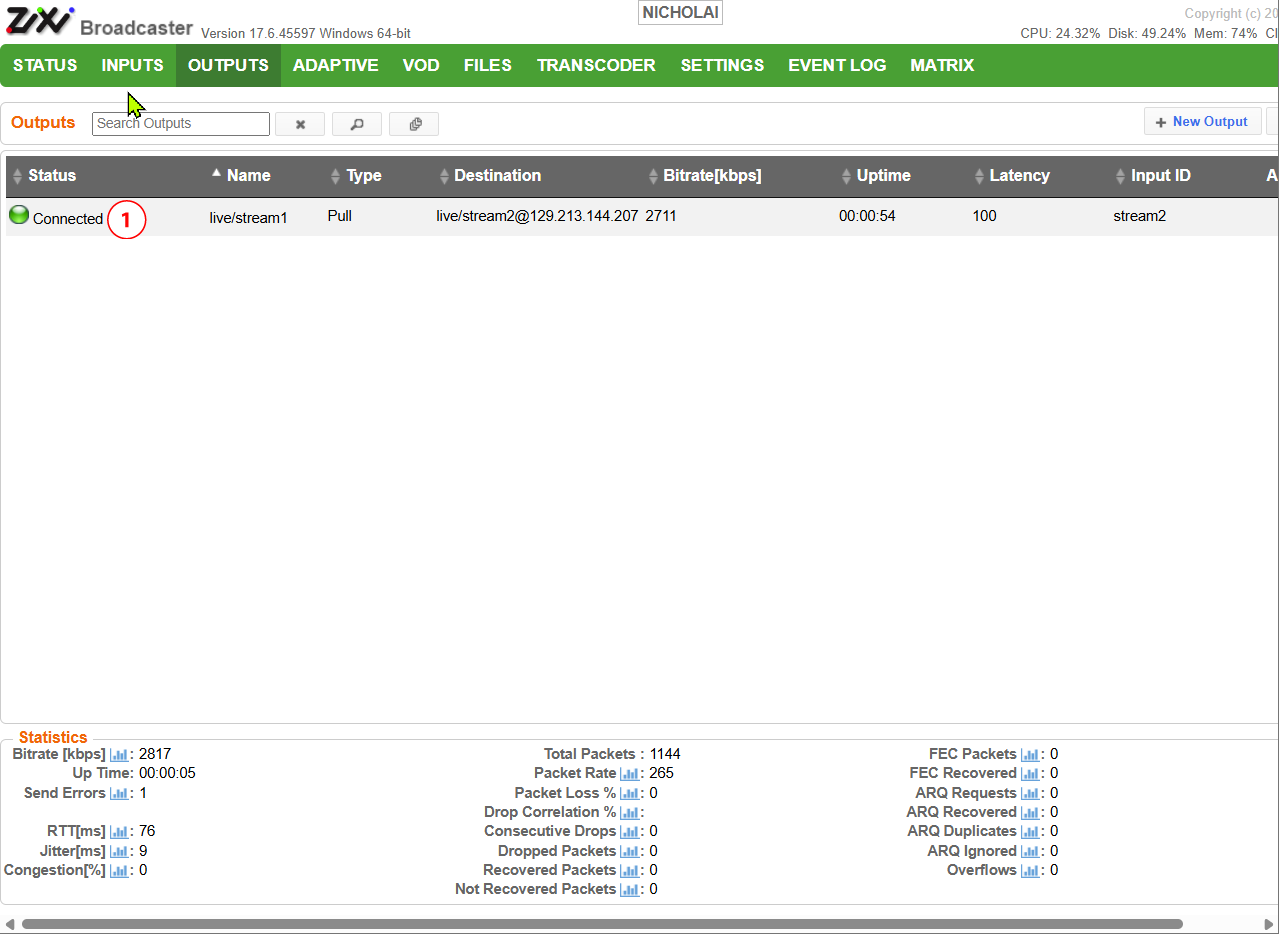
And you will see the “green” Connected indicator on the Zixi Broadcaster OUTPUT tab (1). Note: as mentioned above, if you have not enabled port forwarding, the connection may not be established.
Create a Player
To create a player you will copy the Embedded Player information from the Pub/Sub Details of your deployment. This information will be used to create a webpage with a player.
Edit an HTML file on your webserver and paste the Embedded Player code you copied from the Pub/Sub Details page. The HTML file should look something like this:
<!DOCTYPE html>
<html lang="en">
<head>
<meta charset="UTF-8" />
<meta name="viewport" content="width=device-width, initial-scale=1.0" />
<title>Red5 Player Embed</title>
</head>
<body>
<iframe
frameBorder="0"
allow="camera https://red5pro.github.io; microphone https://red5pro.github.io;"
src="https://red5pro.github.io/red5pro-webrtc-sdk?host=rc-userid-abcdefg1234.cloud.red5.net&app=live&stream_name=stream1&api_version=v1&node_group=default&mode=sub">
</iframe>
</body>
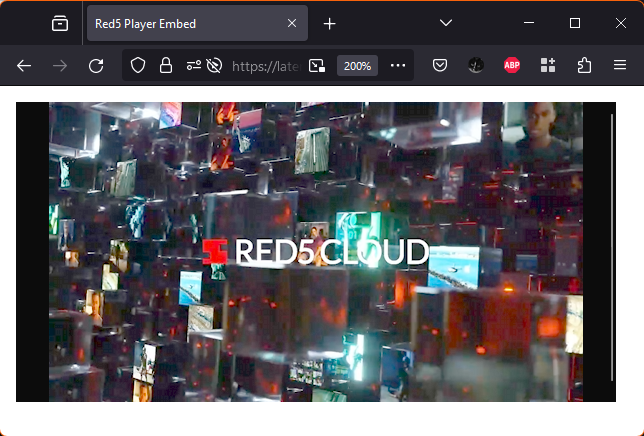
</html>Save the file and open it from a webbrowser. You should see your stream playing in the player: